Set up BigQuery as a Reverse ETL source in RudderStack and send data to your downstream destinations.
13 minute read
Google BigQuery is an industry-leading, fully-managed cloud data warehouse that lets you store and analyze petabytes of data in no time.
RudderStack supports Google BigQuery as a source from which you can ingest data and route it to your desired downstream destinations.
Grant permissions
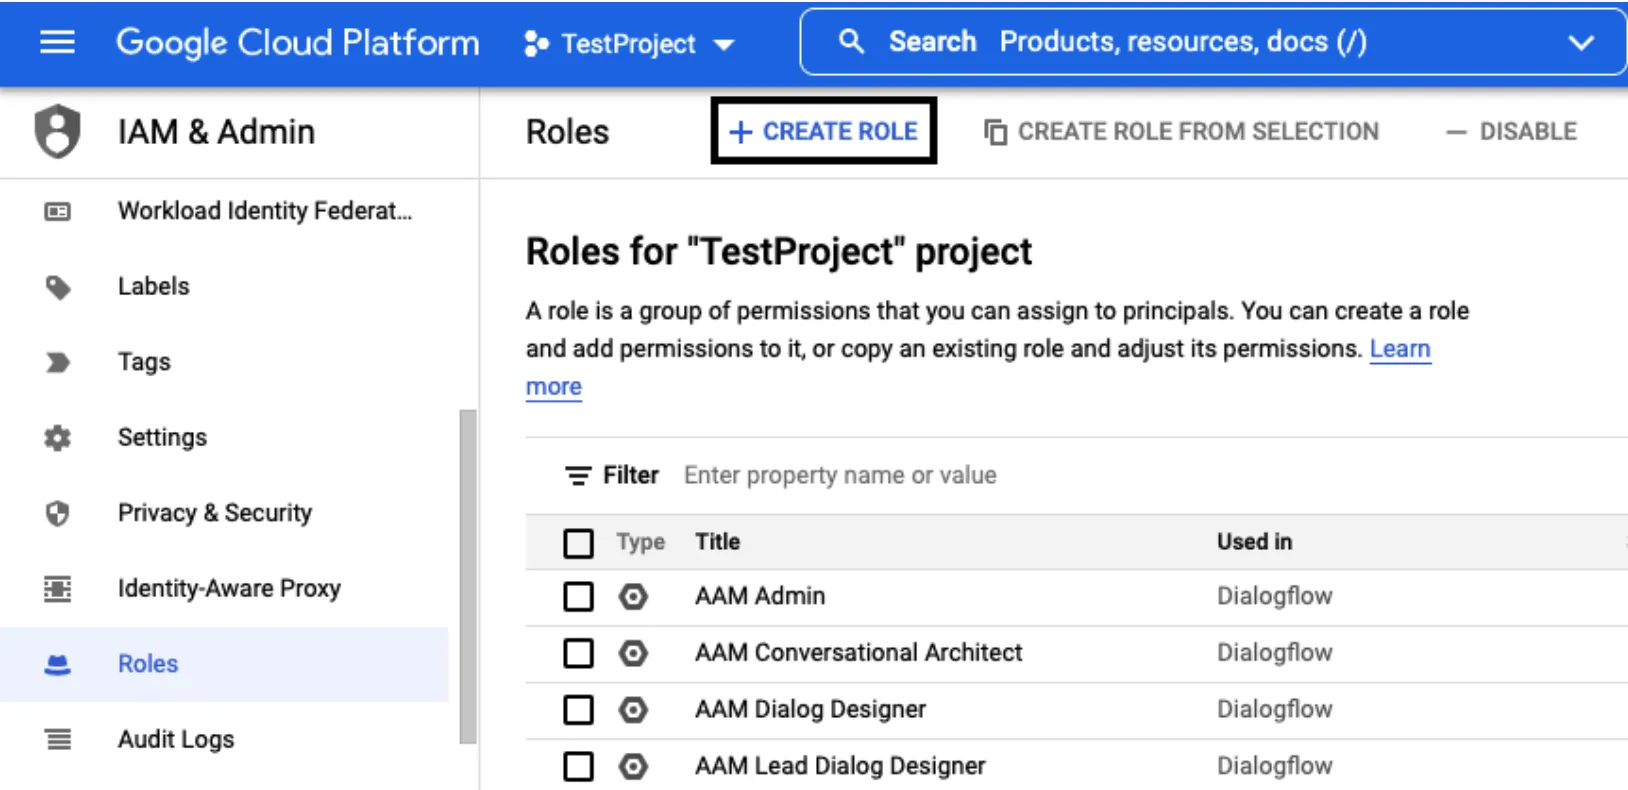
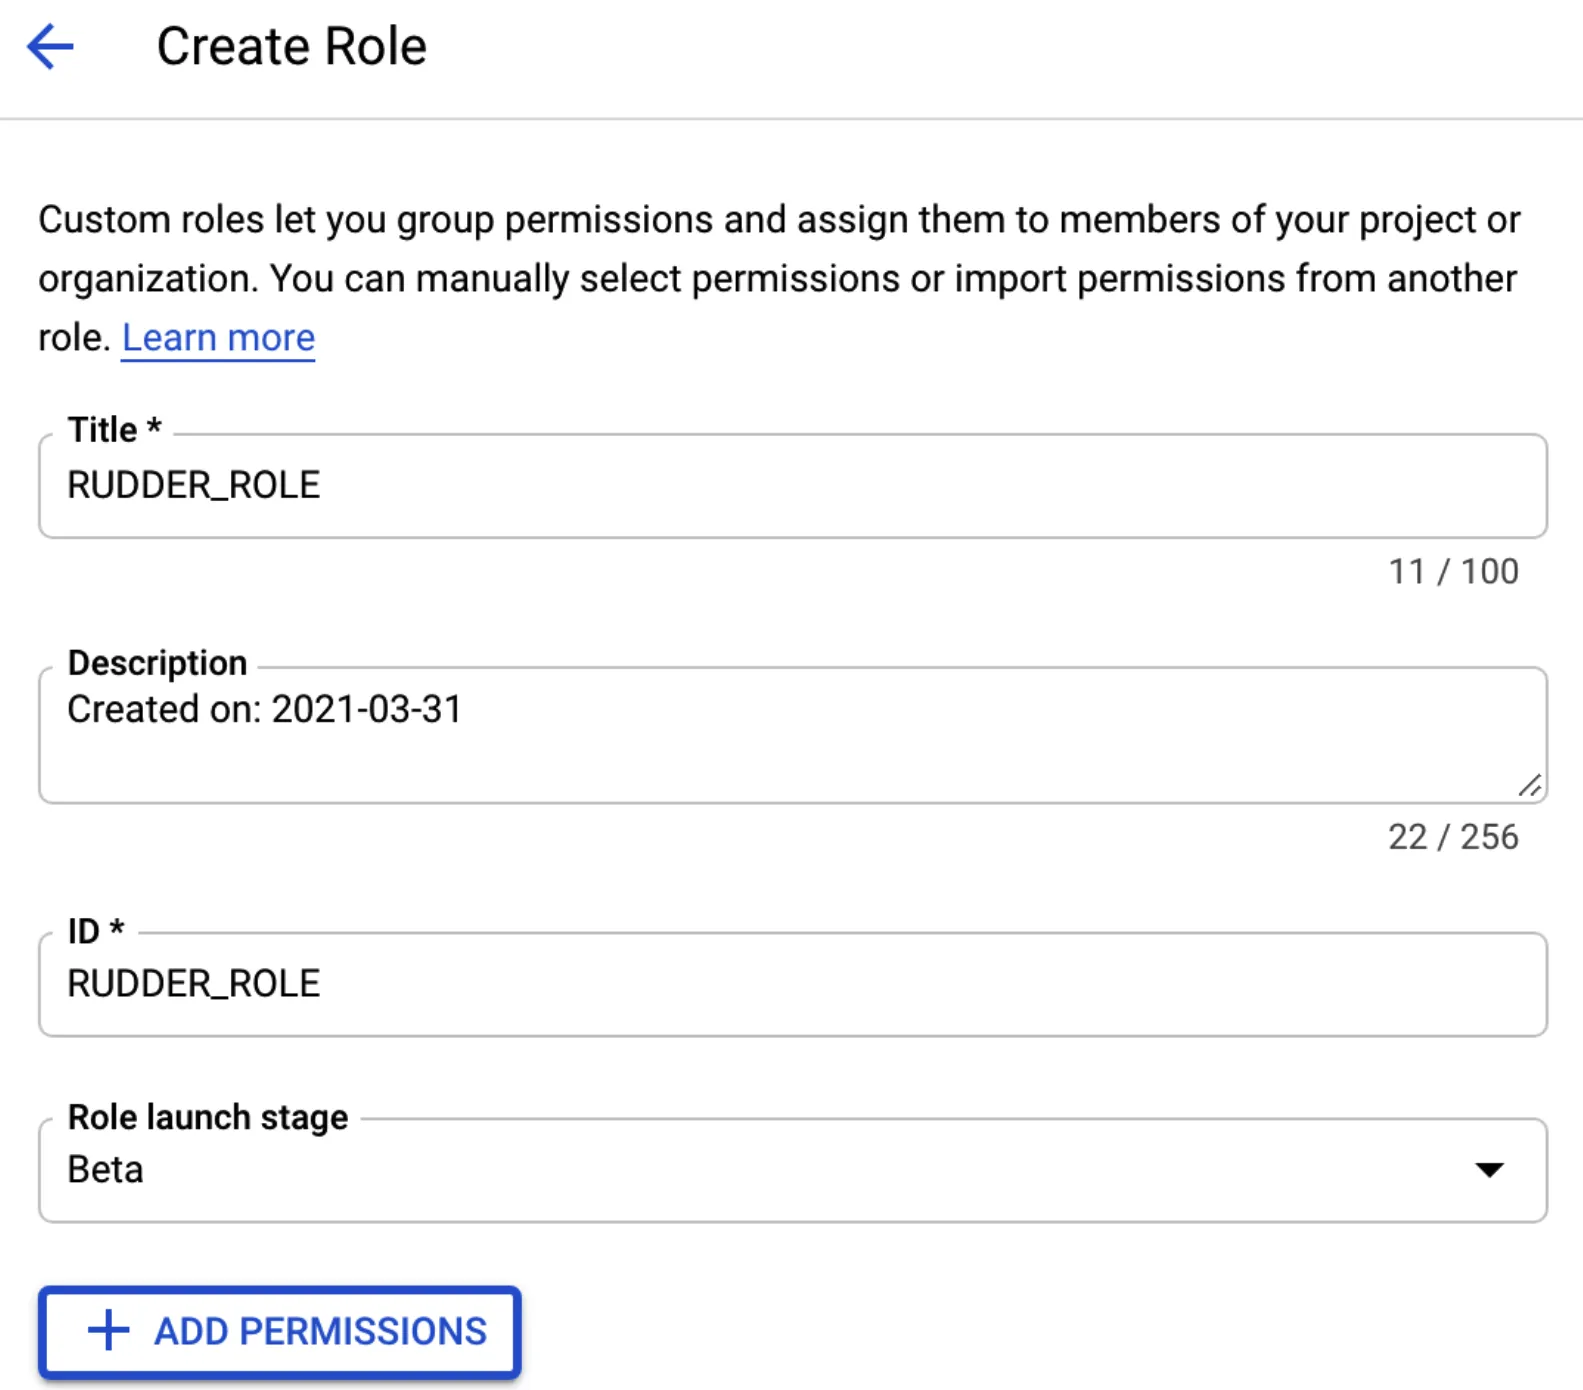
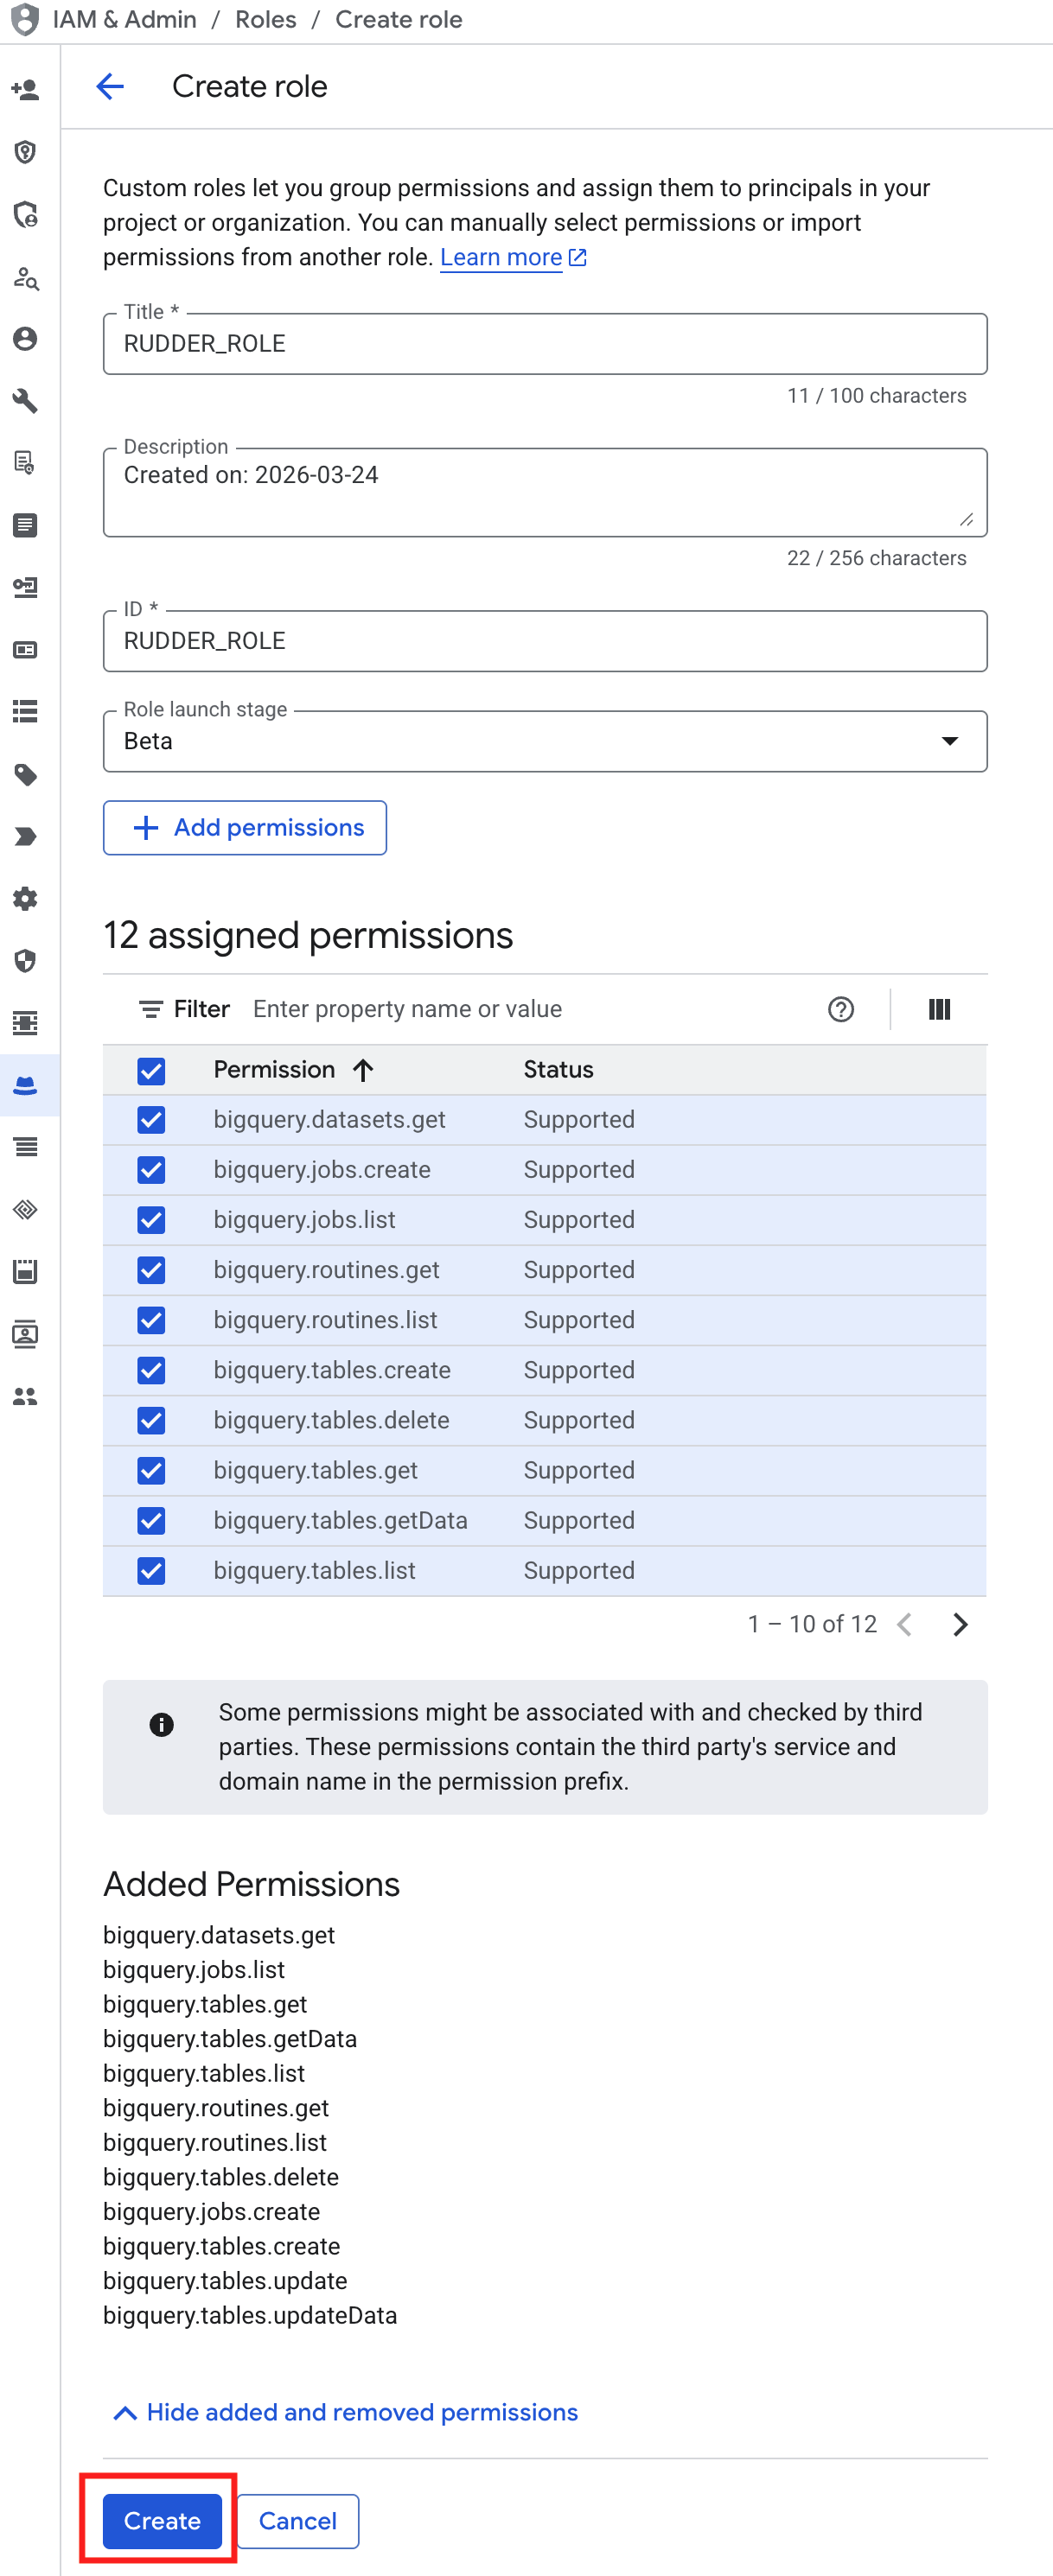
Before you set up BigQuery as a source, you must grant certain permissions on your BigQuery warehouse for RudderStack to access data from it.
RudderStack can authenticate to BigQuery with a service account key (described in the steps below) or through workload identity federation, which doesn’t require you to create or share a key.
Click here to see how the above options are seen in the Google Cloud Console.
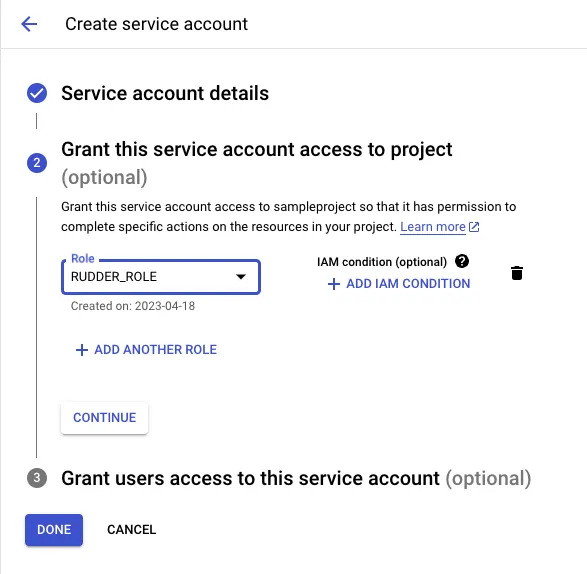
Step 2: Create service account and attach role
Complete this step if you’re using a Service Account Key or workload identity federation with service account impersonation. If you’re granting access directly to federated identities, skip creating a service account and assign the role from step 1 directly to the federated principal in the workload identity federation setup.
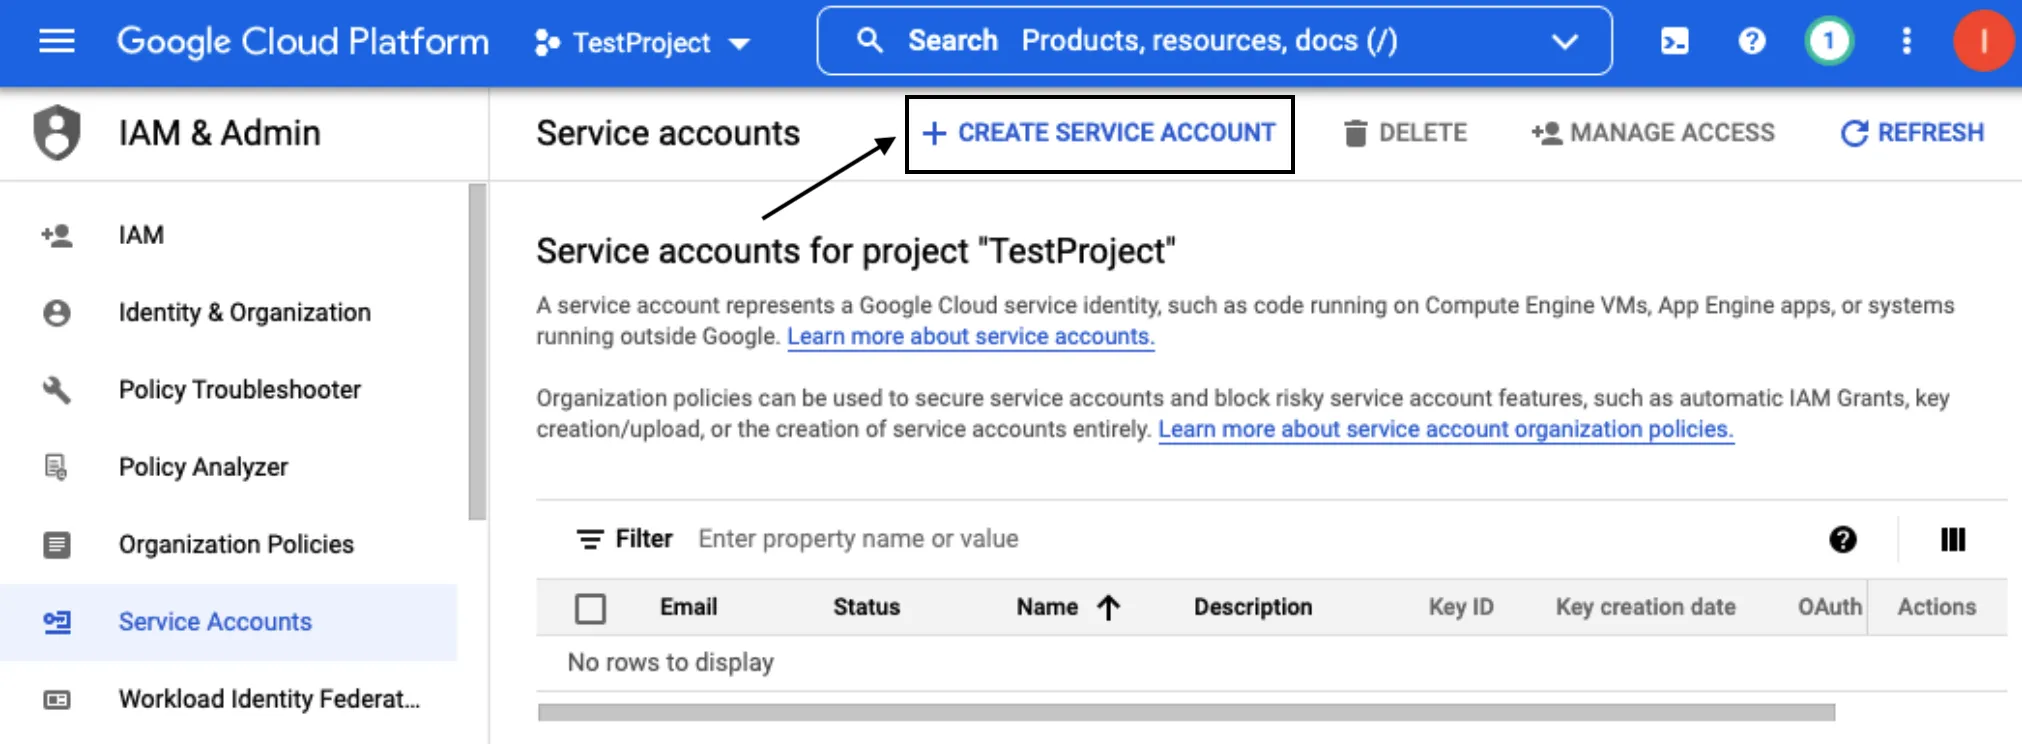
Go to Service Accounts and select the project which has the dataset or the table that you want to use.
Click CREATE SERVICE ACCOUNT.
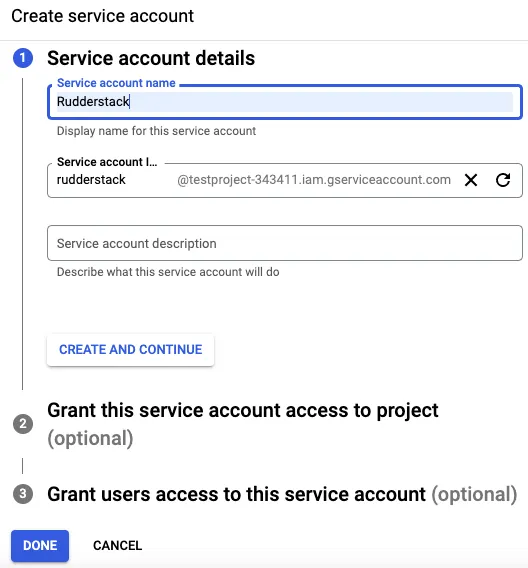
Fill in the Service Account details as shown below, and click CREATE AND CONTINUE:
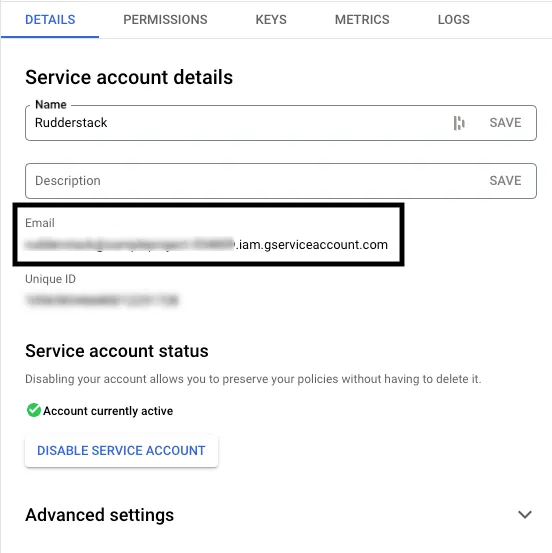
Click DONE to move to the list of service accounts.
Note down the service account ID. You will need this ID while creating the RudderStack schema and granting the required permissions to it. If you’re using workload identity federation with service account impersonation, the service account email is also the value you enter in Target Service Account.
Step 3: Create and download JSON key
Complete this step only if you’re using a Service Account Key. Workload identity federation doesn’t require a key.
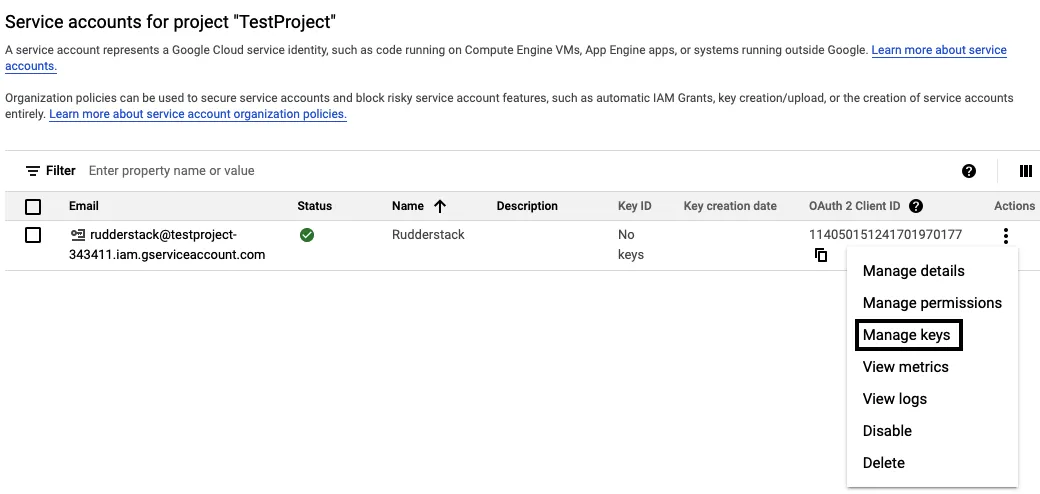
Click the three dots icon under Actions in the service account that you just created and select Manage keys:
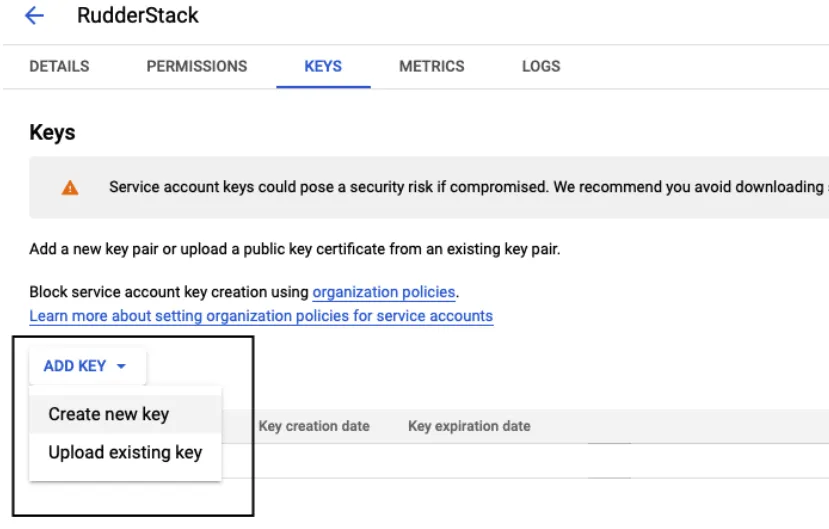
Click ADD KEY, followed by Create new key:
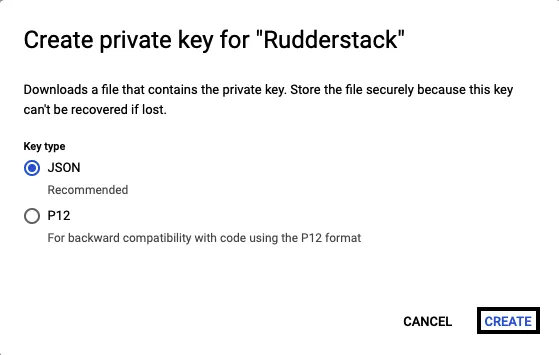
Select JSON and click CREATE.
A JSON file is downloaded to your system. This file is required while setting up the BigQuery source with Service Account Key authentication in RudderStack.
Step 4: Create RudderStack schema and grant permissions
In your BigQuery SQL workspace, go to the project associated with the Project ID you specify in RudderStack, then run the following command to create a dedicated schema rudderstack_.
The rudderstack_ schema stores Reverse ETL sync state, snapshots, and related tables. Do not change this name.
The rudderstack_ schema must be in the same BigQuery location as the dataset you sync from — RudderStack creates snapshot tables with a single statement that reads your source tables, and BigQuery cannot query across locations. create schema uses your project’s default region, so if your source dataset is elsewhere, set the location explicitly. For example, for a source dataset in europe-west3, run:
The <SERVICE_ACCOUNT_ID> takes the form of name@your-gcp-project.iam.gserviceaccount.com. You can also find it in the client_email key of the service account credentials JSON file downloaded in Step 3: Create and download JSON key.
BigQuery’s GRANT DCL doesn’t accept principal:// or principalSet:// principals. Grant access through the Google Cloud console instead:
In the BigQuery Explorer, select the rudderstack_ dataset.
Go to Sharing > Permissions and click Add principal.
Paste principalSet://iam.googleapis.com/projects/<PROJECT_NUMBER>/locations/global/workloadIdentityPools/<POOL_ID>/attribute.workspace/<WORKSPACE_ID>, replacing the placeholders with the same values you used in step 5 of the workload identity federation setup.
Assign the BigQuery Data Owner role.
Set up workload identity federation for RudderStack
With workload identity federation, RudderStack accesses BigQuery through a workload identity pool in your Google Cloud project, so you don’t create or share a service account key.
In the Google Cloud console, enable the Security Token Service API. If you plan to use service account impersonation, also enable the IAM Service Account Credentials API. Then, go to IAM & Admin > Workload Identity Federation and click Create pool. Enter a name and ID for the pool.
Add an AWS provider to the pool. Enter a name and ID for the provider, and enter 422074288268 as the AWS account ID.
The pool/provider ID must be 4–32 characters using lowercase letters, numbers, and hyphens, and cannot start with gcp-.
Under Attribute mapping, add the following mappings:
Under Attribute conditions, add the following condition, replacing <WORKSPACE_ID> with your workspace ID. Then, save the provider.
attribute.workspace == '<WORKSPACE_ID>'
This condition scopes the provider to a single RudderStack workspace. If you connect BigQuery sources from multiple workspaces, add a separate provider for each workspace or extend the condition to list every workspace ID.
Grant your workspace access to BigQuery, either directly or through a service account:
In the project containing your BigQuery data (the project you enter as Project ID in RudderStack), go to IAM & Admin > IAM, click Grant access, and enter the following principal. This project can differ from the project containing the workload identity pool. Replace <PROJECT_NUMBER> with the project number shown in IAM & Admin > Settings for the project containing the pool, <POOL_ID> with the pool ID from step 1, and <WORKSPACE_ID> with your workspace ID:
In the project containing your BigQuery data (the project you enter as Project ID in RudderStack), create a service account with the permissions listed in Step 1: Create role and grant permissions. This project can differ from the project containing the workload identity pool. You don’t need to create a key.
Then, open your pool, click Grant access, and select Grant access using service account impersonation. Select the service account you created and, under Select principals, select workspace as the attribute and enter your workspace ID as the value. Click Save. You don’t need to download the configuration file.
In the RudderStack dashboard, set Authentication Method to Workload Identity Federation and enter the required warehouse credentials.
Changes to IAM grants, attribute mappings, and attribute conditions can take several minutes to take effect. Until then, credential verification can fail with a permission error.
Under Sources, click Reverse ETL and select BigQuery.
Configure warehouse credentials
You can choose to proceed with your existing warehouse credentials if you have configured them in the RudderStack dashboard previously. Otherwise, click Add new credentials to add new credentials for your warehouse.
Setting
Description
Authentication Method
Select how RudderStack authenticates to BigQuery. You can switch an existing source from Service Account Key to Workload Identity Federation at any time — RudderStack stops using the stored credentials JSON once you switch:
Service Account Key (default): Authenticate with a service account credentials JSON.
Add the contents of the GCP service account credentials JSON downloaded in Step 3: Create and download JSON key. This setting is visible only if Authentication Method is set to Service Account Key.
Project ID
The GCP project ID containing your BigQuery data. For Service Account Key, this read-only field is automatically populated from the project_id field in the credentials JSON. For Workload Identity Federation, this field is editable and required.
Service account
The service account email. This read-only field is automatically populated from the client_email field in the credentials JSON and is visible only if Authentication Method is set to Service Account Key.
Workload Identity Pool Project Number
The required numeric project number of the project containing your workload identity pool, for example, 123456789012. This digits-only value is different from the Project ID. Visible only if Authentication Method is set to Workload Identity Federation.
Workload Identity Pool ID
The required pool ID from step 1, for example, rudderstack-pool. Visible only if Authentication Method is set to Workload Identity Federation.
Workload Identity Provider ID
The required AWS provider ID from step 2, for example, rudderstack-aws. Visible only if Authentication Method is set to Workload Identity Federation.
Target Service Account
The optional service account email to impersonate, in the format <name>@<project-id>.iam.gserviceaccount.com. This setting is required only for service account impersonation; leave it empty when using federated identities. Visible only if Authentication Method is set to Workload Identity Federation.
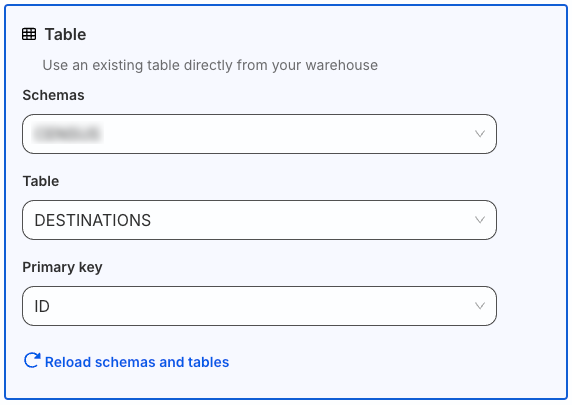
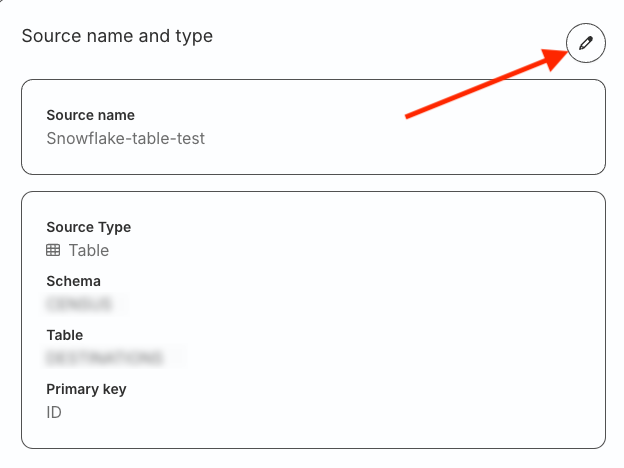
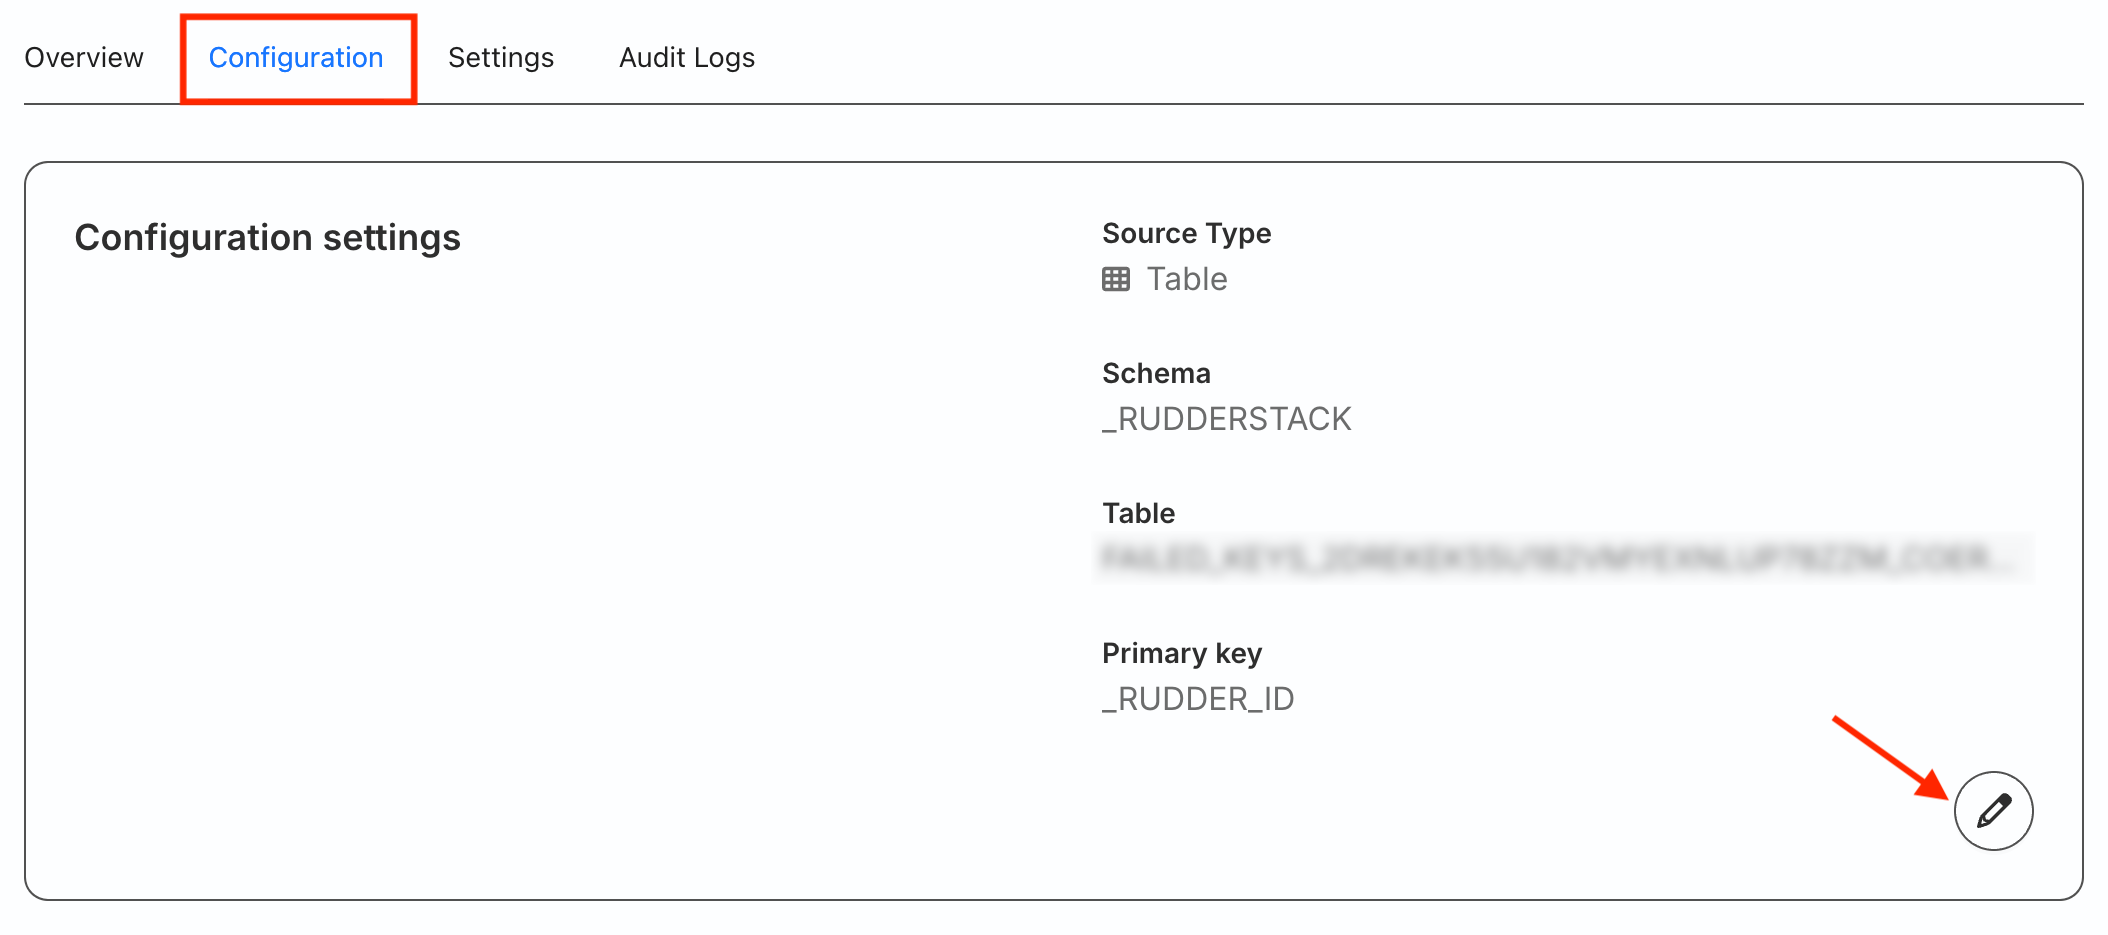
Under Select your source type, choose Table and specify the below fields:
Schema: Select the warehouse schema from the dropdown.
Table: Choose the required table from which RudderStack syncs the data.
Primary key: Select the column from the above table that uniquely identifies your records in the warehouse.
RudderStack uses the primary key column for diffing in case of incremental syncs. You can generate it by:
Generating your table with a primary key, OR
Creating a table view
You can use a composite key in cases where one column cannot be considered as a primary key. For example, you can a declare a composite key of user_id and timestamp by creating a view on your warehouse table.
Under Select your source type, choose Model and click Continue.
To configure a model as source:
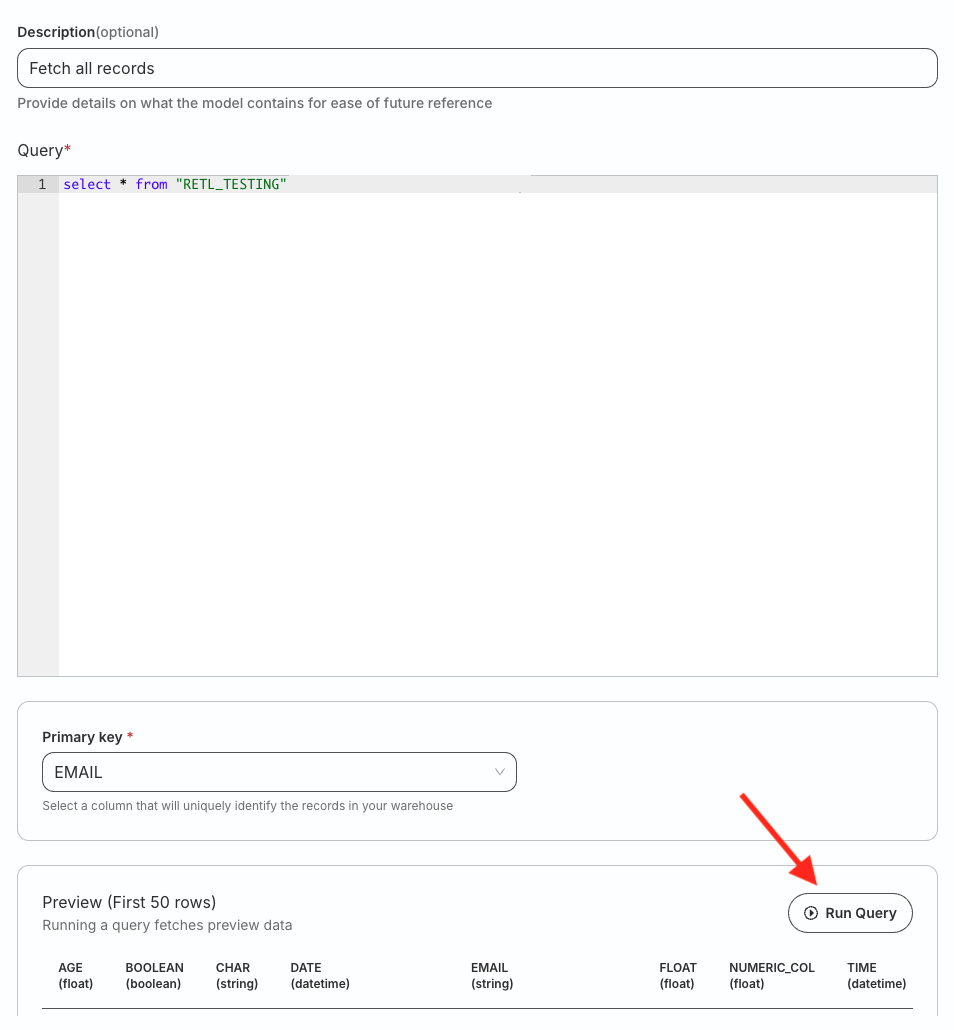
Enter an optional description and specify the custom SQL query in Query section.
Click Run Query to fetch the data preview.
Select the Primary key to use a column that uniquely identifies your warehouse records.
You can set a primary key only after you run the SQL query successfully using the Run Query option.
RudderStack uses the primary key column for diffing in case of incremental syncs. You can generate it by:
Generating your table with a primary key, OR
Creating a table view
You can use a composite key in cases where one column cannot be considered as a primary key. For example, you can a declare a composite key of user_id and timestamp in SQL query of the model.
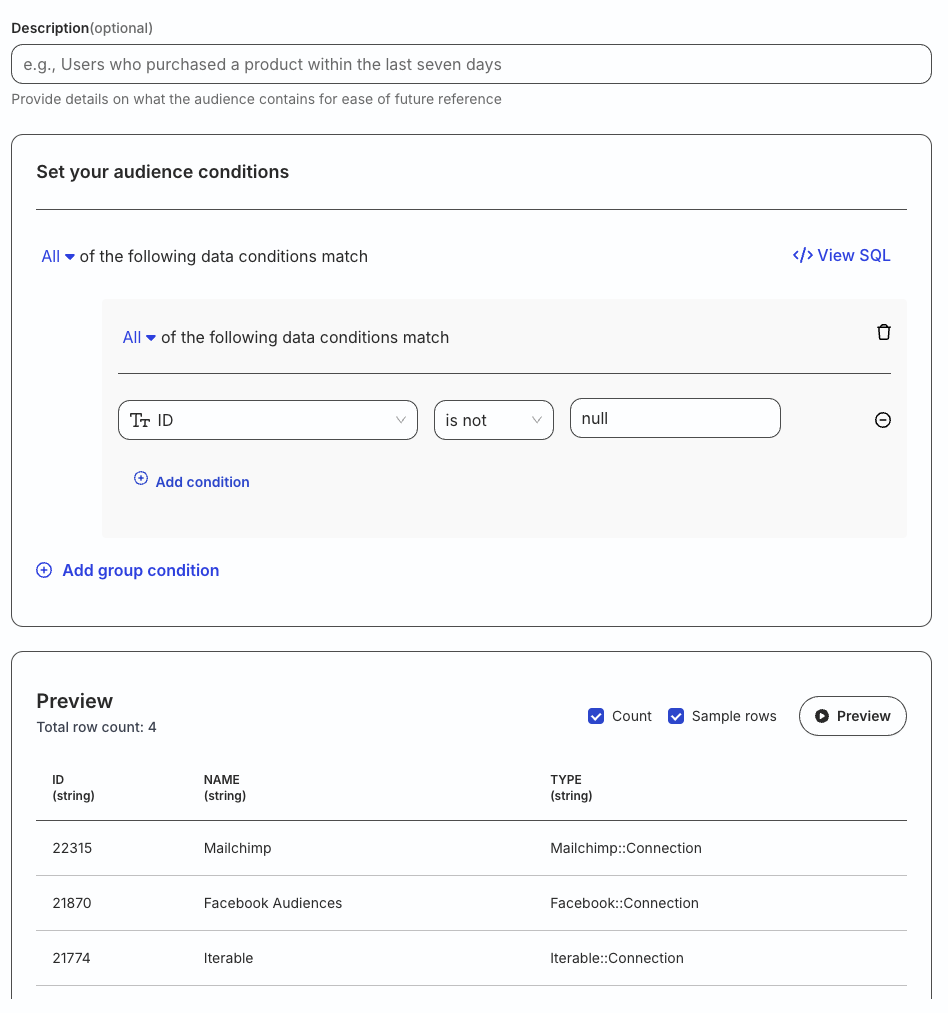
This Audiences feature leverages the Reverse ETL workflow.
To build targeted, no-code audience segments from warehouse data and activate them downstream, use Rudder Lookout instead.
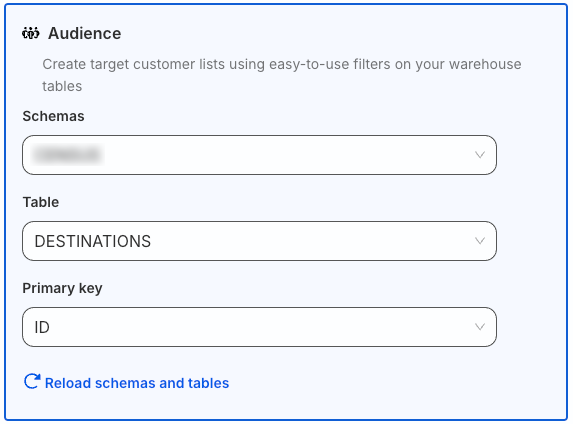
Under Select your source type, choose Audience and follow these steps:
Configure your audience source by specifying the below fields:
Schema: Select the warehouse schema from the dropdown.
Table: Choose the required table from which RudderStack syncs the data.
Primary key: Select the column from the above table that uniquely identify your records in the warehouse.
RudderStack uses the primary key column for diffing in case of incremental syncs. You can generate it by:
Generating your table with a primary key, OR
Creating a table view
You can use a composite key in cases where one column cannot be considered as a primary key. For example, you can a declare a composite key of user_id and timestamp by creating a view on your warehouse table.
You cannot delete a source that is connected to any destination.
FAQ
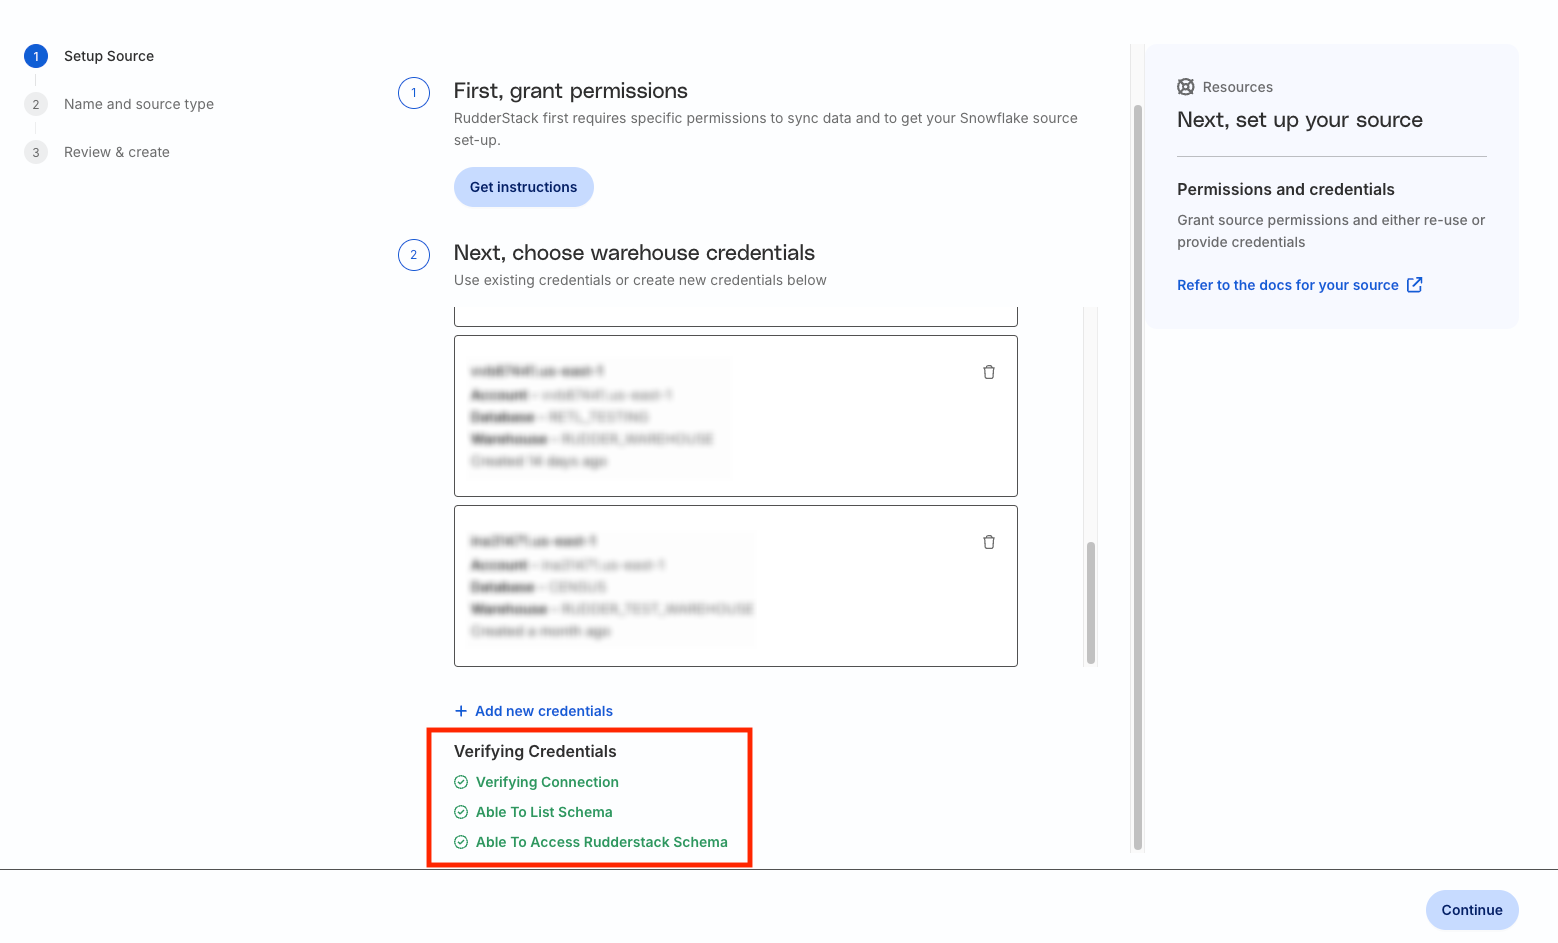
What do the three validations under Verifying Credentials imply?
When setting up a Reverse ETL source, you will see the following three validations under the Verifying Credentials option once you proceed after entering the warehouse credentials:
These options are explained below:
Verifying Connection: This option indicates that RudderStack is trying to connect to the warehouse with the provided warehouse credentials.
If this option gives an error, it means that one or more fields specified in the warehouse credentials are incorrect. Verify your credentials in this case.
Able to List Schema: This option checks if RudderStack is able to fetch all schema details by using the provided credentials.
Able to Access RudderStack Schema: This option implies that RudderStack is able to access the _rudderstack schema you have created by running all commands in the User Permissions section.
If this option gives an error, verify if you have successfully created the _rudderstack schema and given RudderStack the required permissions to access it.
What is the difference between the Table, Model, and Audience options when creating a Reverse ETL source?
When creating a new Reverse ETL source, you are presented with the following options from which RudderStack syncs the data:
Source type
Description
Table
RudderStack uses an existing warehouse table as a data source.
This site uses cookies to improve your experience. If you want to learn more about cookies and why we use them, visit our cookie policy. We'll assume you're ok with this, but you can opt-out if you wish
Privacy Overview
This site uses cookies to improve your experience while you navigate through the website. Out of these cookies, the cookies that are categorized as necessary are stored on your browser as they are as essential for the working of basic functionalities of the website. We also use third-party cookies that help us analyze and understand how you use this website. These cookies will be stored in your browser only with your consent. You also have the option to opt-out of these cookies. But opting out of some of these cookies may have an effect on your browsing experience.
Necessary cookies are absolutely essential for the website to function properly. This category only includes cookies that ensures basic functionalities and security features of the website. These cookies do not store any personal information.